The Bevington VI

Leave a comment

Brad and I have been friends since Ms. Arons art class in 7th grade.  That was almost 25 years ago!  The two us and a handful of other friends have played lots of music together throughout the years.  Not just play music, but we’ve all gone through so much in life together.  You don’t hang out with someone for 25 years and not have some wild adventures!  Brad is primarily a bass player, but he also has a penchant for guitar, uke, drums and synthesizers. 

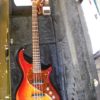
A while back he got on a Fender Bass VI kick.  He asked if I could make him one, but he doesn’t really want a “Fender” Bass VI.  He wants whatever my crazy mind comes up with.  With this particular project he gave me complete creative control,  The only question I asked was, “is there was anything he was into lately?”  He answered with “triangles” which was a perfect answer.  I asked my question so I could get a starting point for whatever inlay was going to end up on his guitar.  Triangles it is!

The only spec I kept from Fender’s design  is the scale length, 30”.  The nut width and last fret width on the Fender I knew were going to be too narrow.  Brad mostly plays bass and a 5 string at that; with plenty of room from string to string.  So I knew from the start that I want the to measurements wider.  

The next thing I wanted to figure out was the bridge design.  Brad did mention he likes having individual string bridges like the ones ABM makes.  At first I was trying to design a base plate that they could rest on, and the bridge plate could be adjusted for height with two adjustable thumbscrews, kind of like a tune-a-matic bridge.  I thought I had something figured out; in fact I thought I had something figure out a few times!  Unfortunately my machining skills aren’t that good; really, they are are almost nonexistent.  I liked the general design though so I settled on something in the middle.  I still used the baseplate design, a piece of Macassar Ebony glued to a base of aircraft grade aluminum.  I was able to make the thumbscrews that secure the baseplate to the body.  I just wouldn’t be able to raise or lower the height of the baseplate.  

Hopefully as time goes on my skills with machining parts will improve.  It is definitely a skill I would like to improve on.  Working with metal has been something I’ve wanted to do more of.  I’ve just never been in that particular environment to learn that skillset.

The next hurdle was the pickups.  Because the string spacing was unique I knew I wouldn’t be able to buy a stock pickup set. I looked long and hard…  Then I remembered a friend of mine, a fellow Roberto-Venn graduate and Luthier extraordinaire, Scott French, had just bought a vintage coil winder and was experimenting with his own pickup designs.  I hopped over to his shop with some drawings I made, to see if it was something he would be into; and I wanted to check out the coil winder.  Thankfully he was into it!  I also gave hime some pieces of maple to make pickup covers with.  I don’t think he had as much fun making the covers as he did the pickups… thanks Scott!

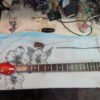
The next crazy bit is the finish.  I knew I wanted to do something different but it wasn’t clear in my mind.  I kept going back and forth about doing an opaque finish; something I had never done before.  I was feeling blues and creams, that’s all I knew.  It was also around this time I had just bought a fancy tape dispenser with a bunch of different width tapes from Stew-Mac.  And one way way or another I ended up with this finish!  If you asked me to do it again I would laugh.  It happens regularly with me; I don’t know where I’m going, I know I’m on a new road, and I just let it roll.  I might be able to do something similar, but by no means the same.  I wouldn’t want to.

This was also the third instrument where I had a lacquer finish on the body and a tung oil finish for the neck, where the neck is also a glued in set neck.  With this one I wanted the neck to be a tighter fit than the first two.  It was a bit too tight this time.  There was some finish stress cracks from glueing in the neck.  Now I know, tight is ok, really tight is not.

It was a fun project for sure.  I look forward to making more of these short scale, six string bass/guitars.  I think for most folks, having a more narrow nut and last fret width will be more comfortable.  But for all you normal low end users, I think this one is the ticket!

You can check out a bunch of Brad’s music at https://soundcloud.com/brad-cacciatore/albums

Specs

30” scale

1.750” nut

2.5” at the 22nd fret

Bone nut

Macassar Ebony fretboard

Two Piece Maple set neck

Alder Body

Birdseye Maple pickgaurd

Custom wound pickups by Scott French 7.5k and 9.5k ohms, respectively

Master Volume

Master Tone

Three way selector switch

ABM individual bridges on a custom platform

Schaller DiVinci tuners

Gold evo fret wire

Oversized strap buttons

Mono Vertigo Case

Brian Chris Rogers

Leave a comment

You would be hard pressed to find anybody involved in the Sacramento music scene who hasn’t heard of Brian Chris Rogers.  OK, you may not have known his name, but you have most likely seen his face on stage, on TV or heard his voice on the radio.  Brian is one of the finest multi-instrumentalists out there playing with the likes of Joe Kye, The J Band, Izabella, founding member of the “Best Jazz Group” SAMMIE winner four years running Four Guys From Reno, Massive Delicious, Bob’s Child, Justin Ferren, The Nibblers, Random Abiladeeze, The Toyes, and The Coalition.  He’s been on stages opening up in front of thousands in rallies for Bernie Sanders.  He’s toured the country in cars, vans and buses all in the pursuit of musical exploration, camaraderie, and sharing with others what he loves, making music.

In addition to his musical collaborations, Brian is also quite the accomplished solo artist.  Being the passionate soul he is, his gear gets a full workout with each show he puts on.  Whether it be his looping bass wizardry or his (very) percussive acoustic guitar chops; Brian puts his instruments thru their paces.

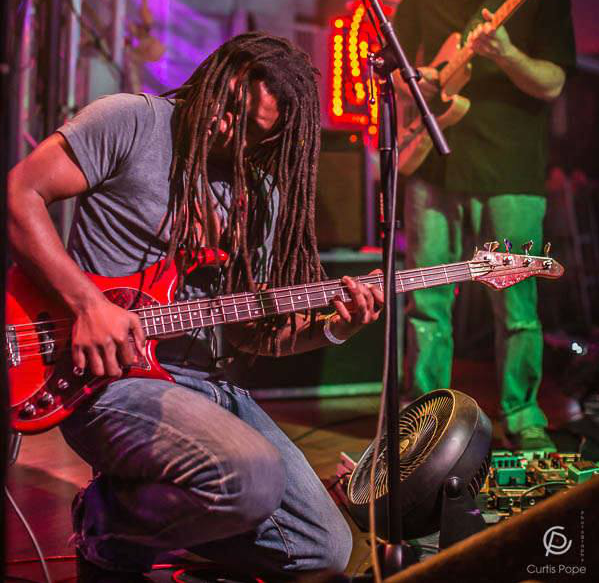
As far as I know he only as two stringed instruments; his Pedula bass and his Breedlove acoustic.  If he has others, I’ve never seen em; not in my shop, or on stage, or whilst hangin with friends.  I could be wrong, whatever….

Both of these guitars have been through the ringer.  I’m not sure how many times I’ve replaced the output jack of the Pedula, but I have lost count.  If memory serves, he got the Pedula right at the end of our senior year in high school or soon there afterwards.  Most fretted instruments need a fret dressing here, a few fret levels there.  And after 20-30 years you replace the frets.  Not the case for the Pedula.  I think it was about two years ago (ten years into it’s life) I gave it a re-fret, and it needed it….  And as is the case with most re-frets, a new nut was needed as well, bone for this one.  The only other bit that needed replacing was the E string de-tuner, one of those fancy tuners with the lever that drops the low E to a D with a flip of a switch.  Those are neato.

The Breedlove was a fun one to fix up.  Brian’s playing style, as I stated before, is very percussive.  Lots of using the guitar as a drum, creating loops and rhythms to play on top of.  But years of beating upon his guitar soon started to show.  First it was a big crack on the top.  Then braces were falling off the top.  Not cracked braces, or loose braces.  Just straight up braces falling out of his guitar!  At first I just fixed the crack in the top like I always do with some small cleats glued  along the top.  This was before braces started to fall out.  When Brian told me about the brace, it wasn’t just the brace, it my cleats too!  Dude works his guitars….

What I decided to do was basically “inlay” a piece of thin spruce in between the x braces, and the side of the guitar.   There was another section I added spruce to in between an ex brace, lower face brace, and the side towards the butt end of the guitar.  These are the points that he slams into the most. So I figured after one failed attempt at a repair, that these areas really need some reinforcement.  It’s a fine line though from reinforcement to tone sucking piece of wood.  It had to be thin enough, but strong.  I sanded the spruce to .027″ thick and I oriented the grain to be perpendicular to the top.

I was (and am) really happy with the result.  The spruce fit really nicely and it didn’t effect the tone at all.

I don’t know if this goes without saying, but the Breedlove’s frets, yeah I’ve messed with those a lot too.  And now that I think about it, I made a new bone nut and saddle for the Breedlove too.  I almost forgot….

Please do yourself a favor and check out Brian’s musical world.  You will be very happy you did!

https://www.facebook.com/brianrogersmusic/

http://www.brianrogersmusic.com/

https://twitter.com/bchrisrogers

https://www.instagram.com/brianchrisrogers/

http://www.brianrogersmusic.com/epk/

The Bradford Bass

Leave a comment

This is bass build numero uno, and it will definitely not be the last.  The bass was made for a very dear friend of mine Brad.  I have known Brad for a very long time, about 20 years now.  We went to school together, played in bands together, went to festivals together; many good times were had to say the least!

There were a number of reasons to build the bass.  A big one was the fact that I, through an auction, bought much of the remaining supplies from the Modulus guitar shop, R.I.P.  With all this newly acquired hardware, electronics, and wood how could I not build a bass.  Brad, being a fantastic bassist and always supportive of his friends, jumped at the opportunity to have me build the bass.

The first design we drew up was waaaay more complicated than the finished bass.  We had inlayed crystals with light shining through them and floating bridges with custom tailpieces and an electronic system that I would still be figuring out today.  After some more brainstorming we decided to tone it back a few notches and go with something more simple; after all, this was my first bass, the key word there being “first”.  There will be plenty of time to get complicated later on.

The fun thing with the Bradford Bass is that the only thing that didn’t come from Modulus, R.I.P., was the cocobolo top which I had bought from LMI on a whim the previous year.  The alder body, two piece maple neck, fingerboard, pickups, tuners, bridge and the truss rod all came from Modulus, R.I.P.  So technically speaking, this is the first Modulus, R.I.P., bass post Modulus, R.I.P.

As for the bass itself, it is a fairly simple beast.  I say beast because it weighs a lot.  I kept the body rather thick and heavy to make sure it wasn’t going to be neck heavy.  It for sure isn’t neck heavy I can tell you that!  Luckily Brad doesn’t mind a little weight on his shoulder.  As per request, it as a black mother of pearl infinity symbol inlayed on the 12th fret, and that’s it for inlays.  The head stock overlay was fun to do.  It’s cocobolo on the front and the back, but just partially done.  I’ve done similar designs before but just on the back, this is the first time I did it on both the back and the front.  The body has a nitro finish with a sunburst on the back.  The neck is finished with tung oil that makes the neck fell oh so silky smooth.

The pickups are two jazz bass style pickups.  I have no idea where or by whom they were made.  The came from Modulus, R.I.P., and that’s all I know.  Were they made in house?  Were they made by someone else?  It is a mystery.  All I do know is that they sound really friggin good.  The controls are simple; two volumes and two tones.

Bada bing, bada boom.

SPECS

-Alder body

-Cocobolo top

-Maple neck

-I think the fingerboard is nara, but I am not 100% positive

-35 inch scale

-5 Sting with a low B

-Two jazz bass style pickups

-Two volume, two tone controls

-Nitro finish on the body

-Tung oil finish on the neck

-And more neck bolts than I dare count….